Front End CategoriesThe purpose of the Front End Categories feature is to allow you to build a customized catalog to present to your customers quickly and easily, using products from a supplier feed. This feature allows you to maintain a separate set of categories in your admin dashboard which mirror your suppliers, so you can easily manage pricing and product updates. It allows you to only show the products, categories, and navigation structure that you designate to your e-commerce customers on the front end. ExplanationBy Default, we will utilize a store with one supplier. Your store will come with the standard categorization of the suppliers product feed, as shown below: 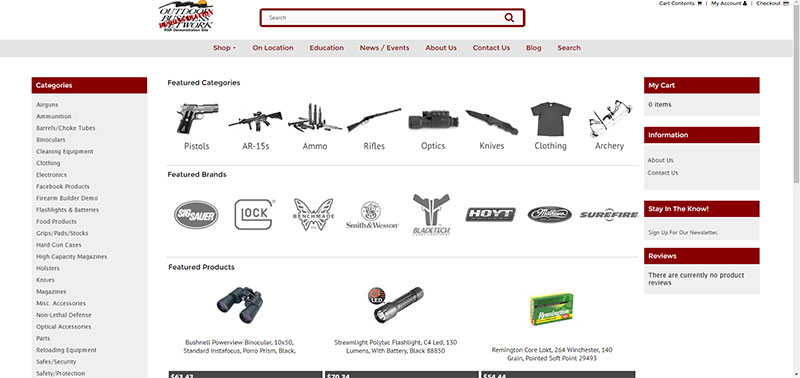 As you can see, the list of products shown to the customer is fairly long. It mirrors the categories listed in your Admin Dashboard. 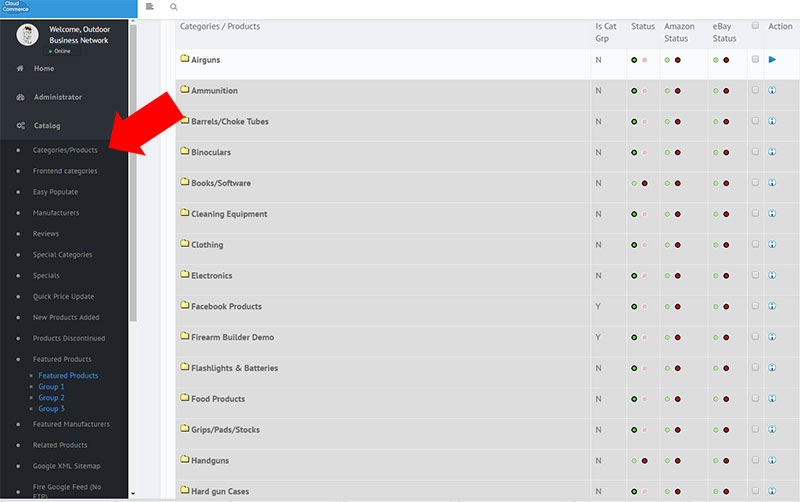 Supplier categorization is usually meant for B2B applications, not optimized for B2C e-commerce. This standard supplier categorization may also not properly reflect your brand or niche. Most e-commerce retailers will want to create their own set of categories to do the following:
Front end categories allows us to set our own categories to show on the front end. The same store, with the same products, using Front End Categories will look like this. 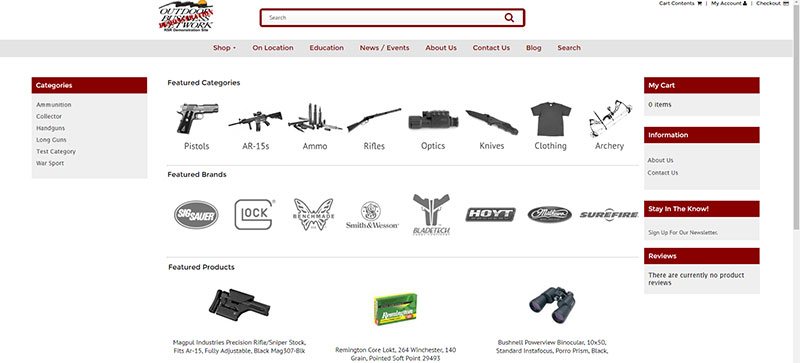 You can now see that there is a dramatic difference in the length of the navigation menu and list of categories. It is now broken down better for easier customer navigation, and to fit the specific brand and merchandising requirements of this individual retailer. Instructions for Use of Front End Categories:Step 1: From the Admin Dashboard left side menu click on “Catalog” to expand the catalog menu. Step 2: Click on “Front End Categories”. (the second menu item under the Catalog menu) Step 3: You should now have open the Front End Categories management page. 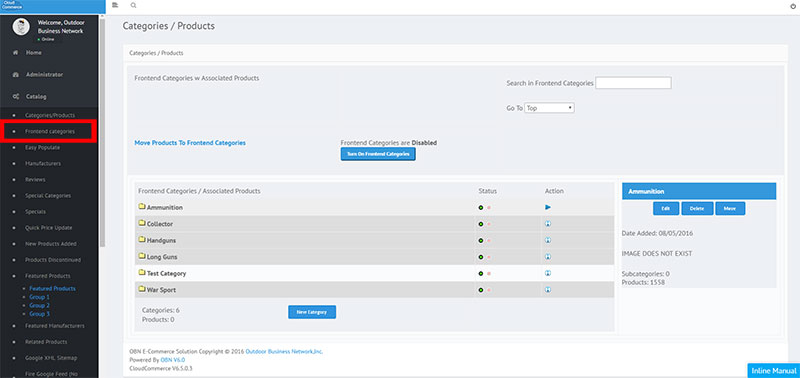 Step 4: Click “New Category” to add a new front end category. 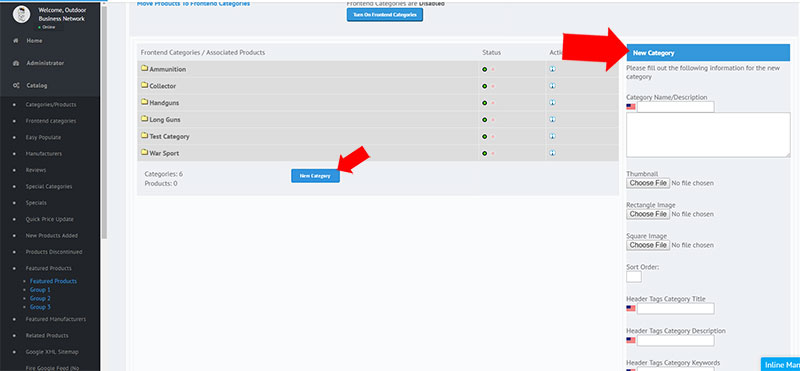 Step 5: Type in the Category Name in the first box next to the American Flag. (Optional: Now you can also add additional text and html in the larger category description box, as well as set a category image, sort order, and customize SEO header tags) 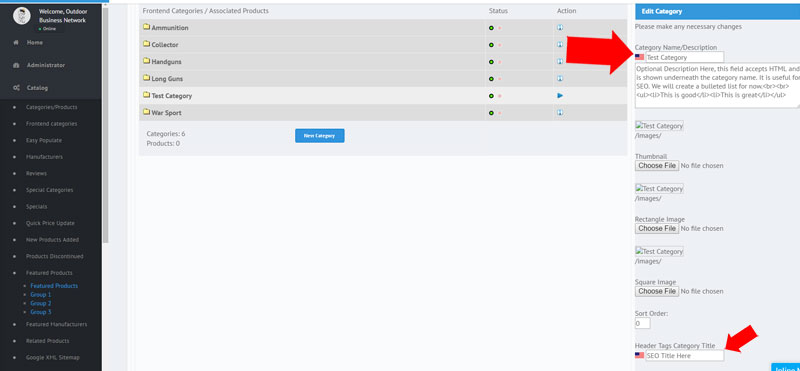 Step 6: You can now see your new category has been added to the list. 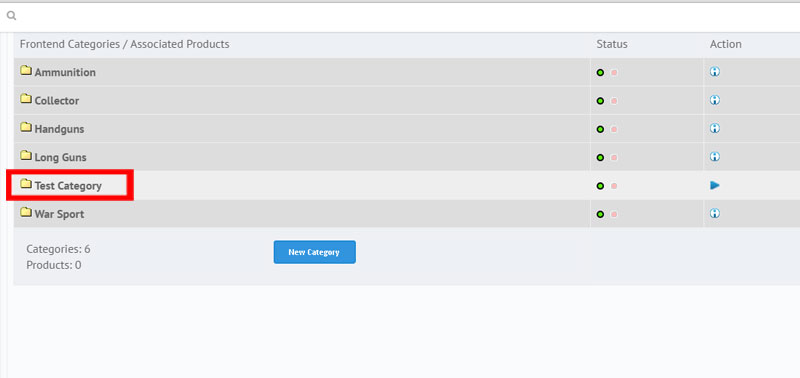 Step 7: The next step is to assign products to your new category. To do this click on the blue “Move Products to Frontend Categories” text link. You will arrive at the following page. This page mirrors your standard supplier feed categories. Think of it as your “Storeroom” or “Backroom” or “Warehouse” shelves. Now we are going to digitally take our products out of the big boxes we recieved from the supplier, dust them off, and arrange them neatly onto the shelves in the retail area of our store, the front room, or the Frontend Categories. 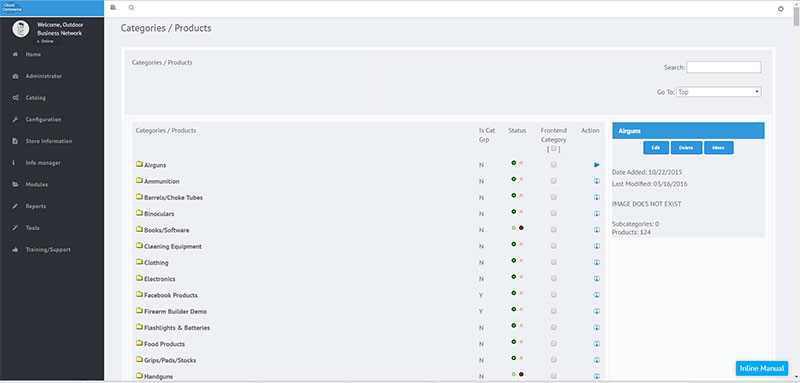 Step 8: Find the products you want to move into your new front end category. For this example, we will imagine our test category should be filled with “Scopes”. We will navigate to the category scopes on this screen, then click the folder to open the category. 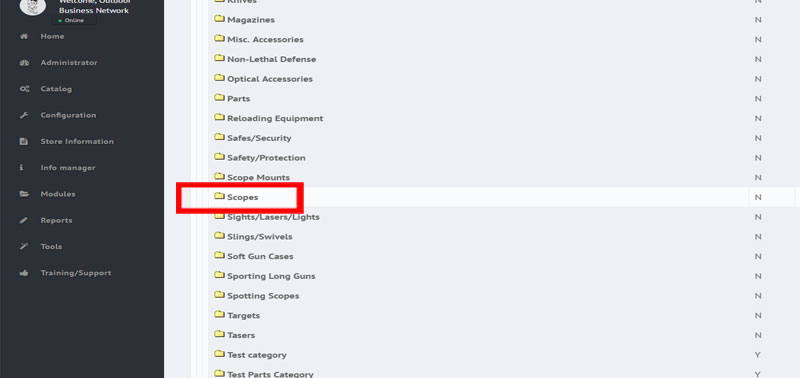 Step 9: Now we will check the boxes next to the products we wish to appear in our Frontend Category. 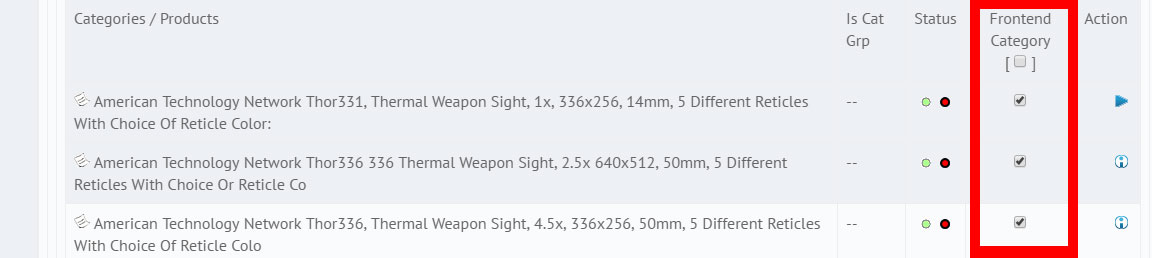 Step 10: Once you have checked all of the items you wish to show in your new category, scroll to the bottom of the page and Click the SELECT drop down arrow to open the list of frontend categories. 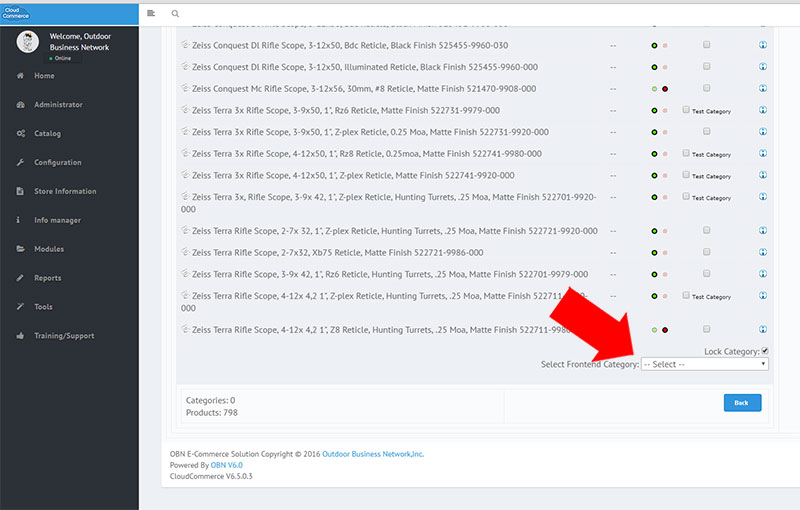 Step 11: Choose the corresponding frontend category. For this example we will choose “Test Category”. 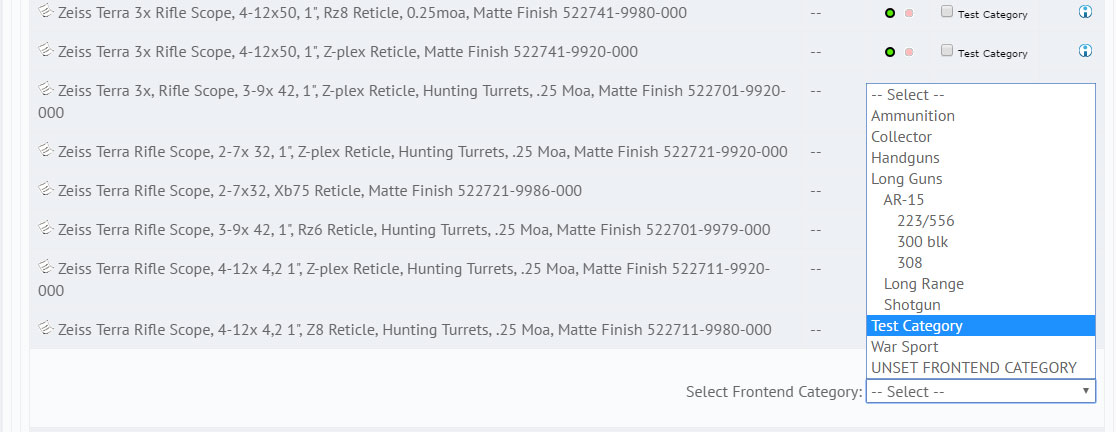 Step 12: A pop up will show, asking you if you are sure you want to add these items to this category. Click OK. (if you are unsure, you can click cancel and keep working, keep in mind, you can always change an items frontend category relationship later).  Step 13: You can now see that the items you checked the box for are confirmed in the new category. In our case, “Test Category”. 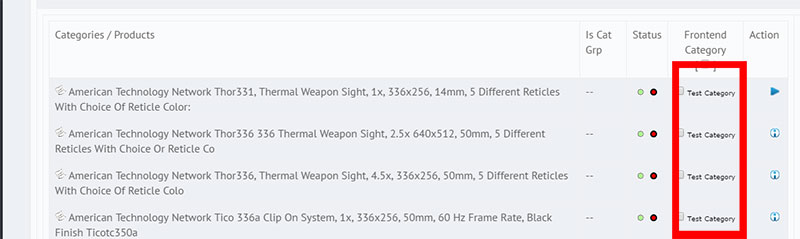 Step 14: Once you are finished assigning products, click on the left side menu, Catalog -> Frontend Categories link to quickly navigate back to the main Frontend Categories management page. You will be familiar with this already from before. Step 15: Repeat steps 4-15 for any additional categories you would like to create. Keep in mind, you can also create and fill subcategories (or categories within categories) as well. Step 16: Once you have created the category structure you want, it is time to turn them on to display these new categories to your customer. Click the “Turn On Frontend Categories” Button on this page: 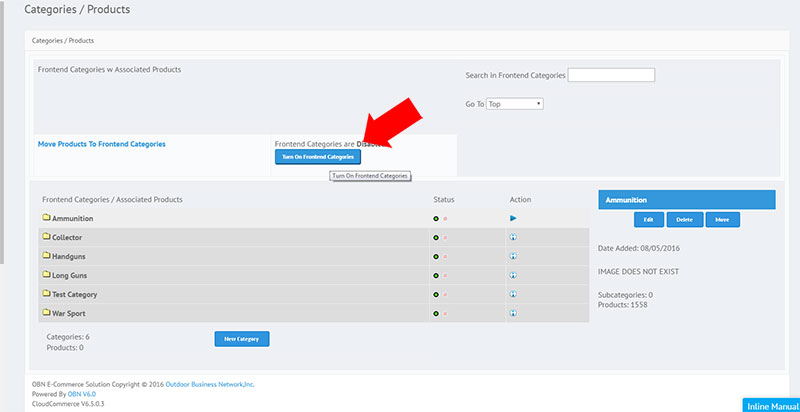 Step 17: Navigate to a new tab with your website's home page in it, and be sure to click to refresh your browser. You will see the new list of categories you built. 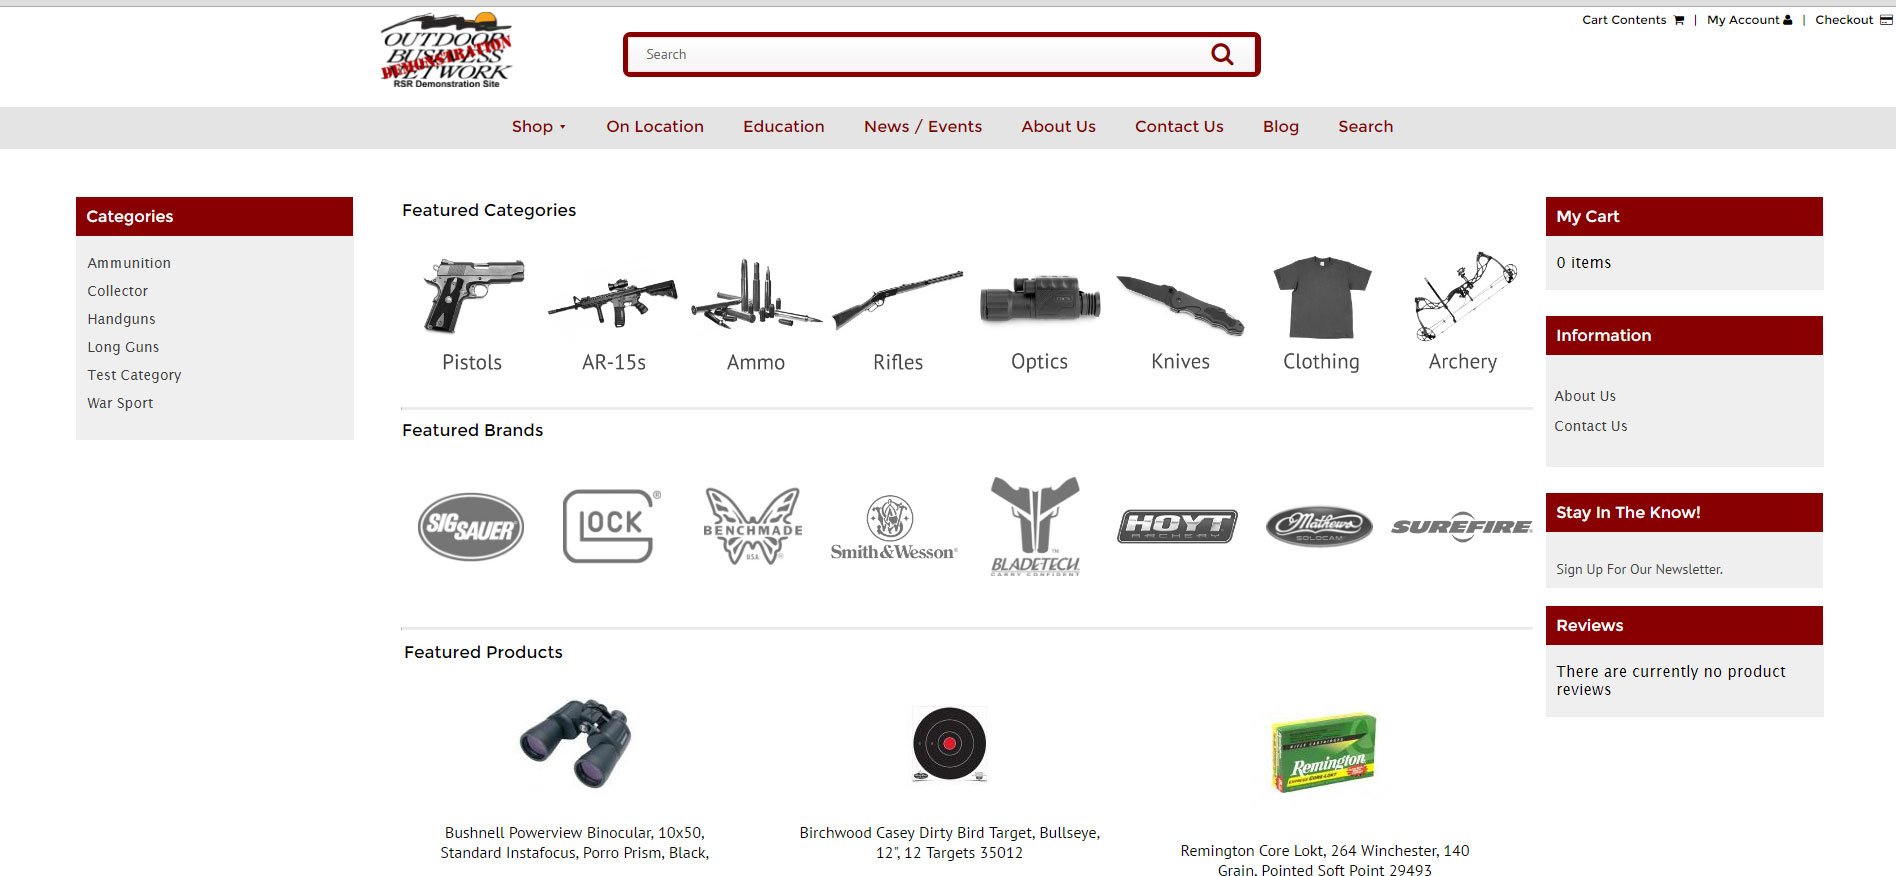 Note:if you do not see these categories, perform the following steps: a) hold down the shift key and click browser refresh b) in your Admin Dashboard, navigate to Configuration -> Cache -> Use Cache -> Edit -> Reset -> Update, then repeat a shift refresh c) clear your browser's cache and cookies, then repeat a shift refresh. Step 18: You can now navigate to your new category, and see the products you have added to it. 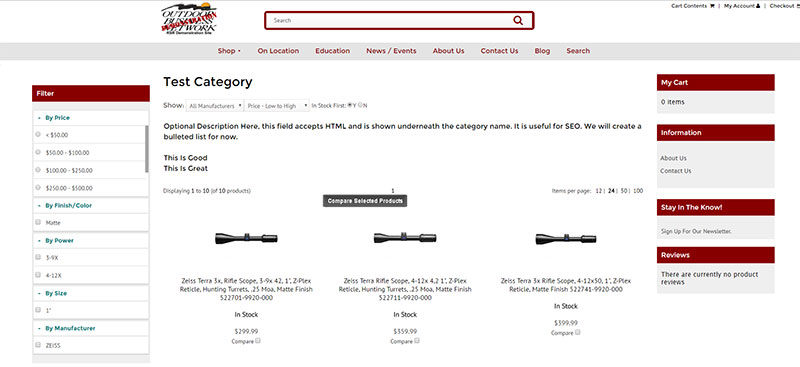 Notes: This may initially seem like quite a few steps. But once you get the process down, you can really move quickly and merchandise large catalogs among multiple vendors and suppliers at a fast rate. You can also go back and move products easily and re-merchandise. For more advanced merchandising, we would suggest you check out our Easy Populate feature, which allows for merchandising and product information management (PIM) through Microsoft Excel Spreadsheets. Of course our support team is always here to help you. If you are stuck, just ask us to help and we gladly will. We also provide a merchandising pack as part of our marketing services, if you would rather us take care of it all for you. We highly suggest if you are using supplier product data feeds to take the time to merchandise your website. Retailers that spend a considerable amount of time on merchandising, creating unique content, SEO, and marketing yield much better sales than those that soley use a standard supplier feed catalog. Need help? Have questions or don't have the time? Be sure to give us a call at 800.699.0820. We are here to help. You can also bring up any issues by using our ticket system. Hope this tutorial was helpful. |
- 4 Users Found This Useful
