|
Step 1: First, we are going to make a new tab and go to the back end of our site.  Step 2: To gain access, you will need to log in. Step 3: Once you are logged in, located the gray bar. Hover over "Catalog". Step 4: A number of options will now be available but we want to hover down the list to "Quick Price Update" and click it. 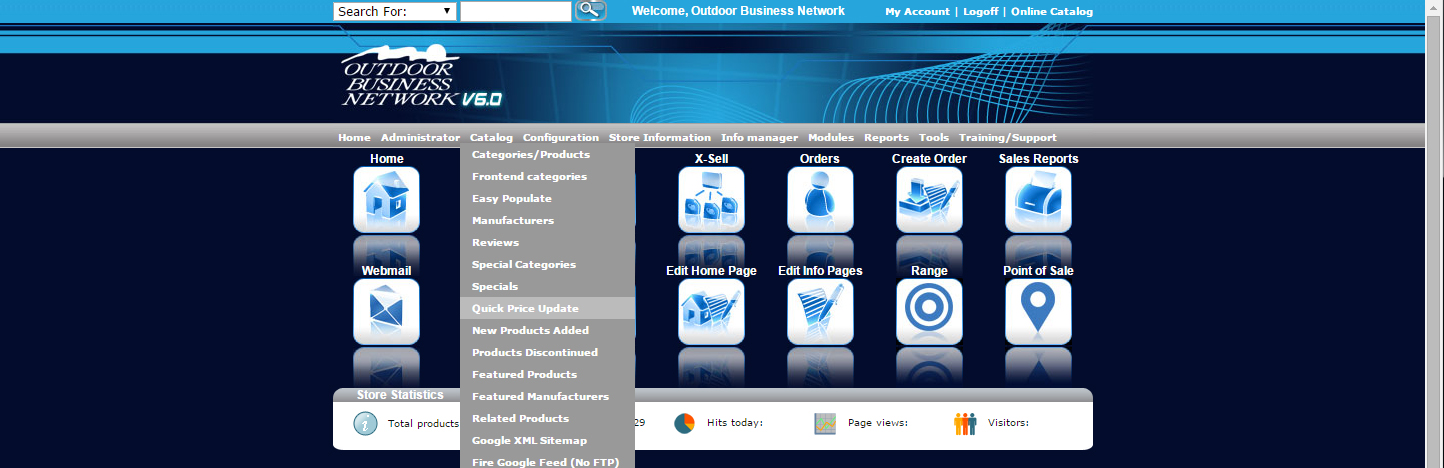 Step 5: After navigating to the Quick Price Update (QPU) page, your page should look similiar to this... 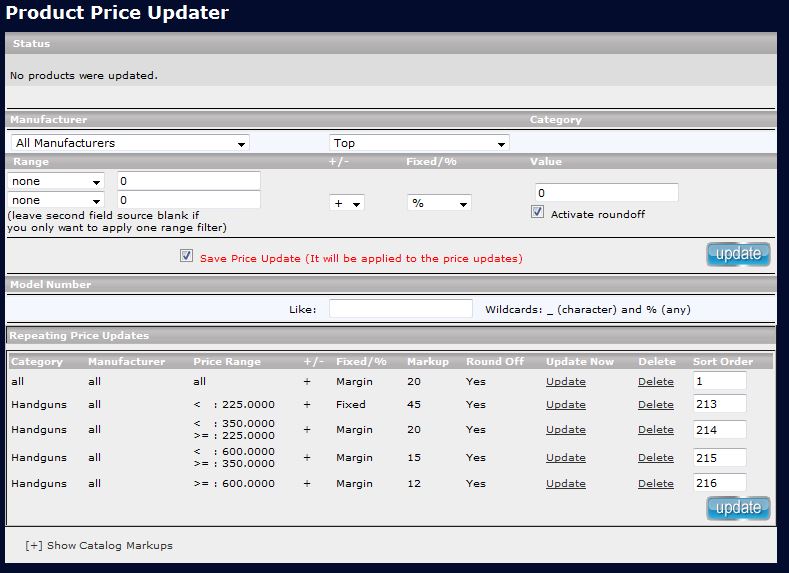 Step 6: Here are the formulas so you understand how the QPU calculates the price... 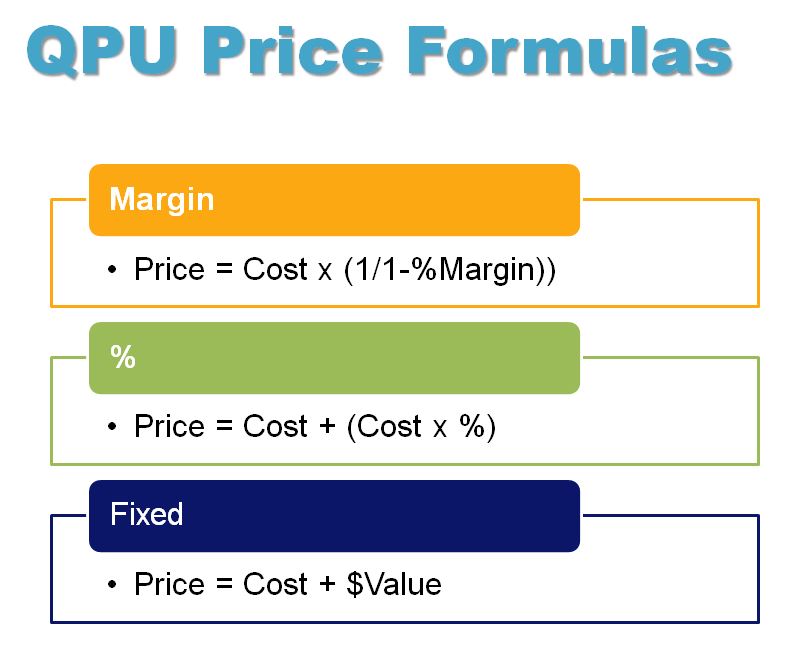 Setting your Mark Up with the QPUStep 7: Down below you can see your categories. By clicking the arrow signs next to them you can see a drop down of the subcategories.  Step 8: You can set your mark up for a particular manufacturer by choosing a manufacturer in the Manufacturer drop down. To set a mark-up price for all products, choose Top in the Category drop down. Otherwise, choose your category or subcategory. Step 9: Choose + in the +/- drop down. Choosing minus would set a mark-up that’s below the whole sale price (This option is useful if you get pricing below the distributor's standard cost pricing). Note:In the "Fixed/%" drop down you can decide if your mark up is a dollar amount or a percentage.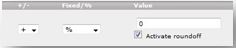 Step 10: Check the "Activate Round-off" box so that the prices are rounded up to a .99 price. Step 11: Type your fixed dollar or a percentage amount in the Value box. Step 12: Make sure "Save Price Update" is checked.  Step 13: Click "Update". Step 14: Locate your new setting in the categories below. The latest change should be your very last and you can also see the date you made your change. 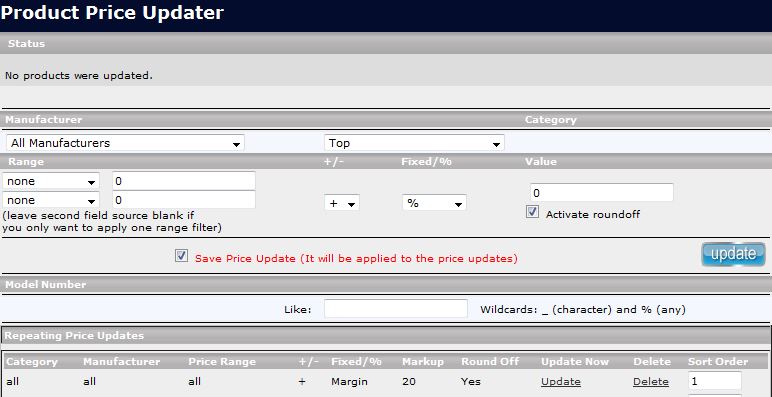 Creating Price RulesLets say we have already marked all our products and manufacturers to a 20% margin BUT we want to do a fixed markup of $45 dollars on all handguns AND we want to mark up our more expensive items with margins. So we create a price plan like this one: 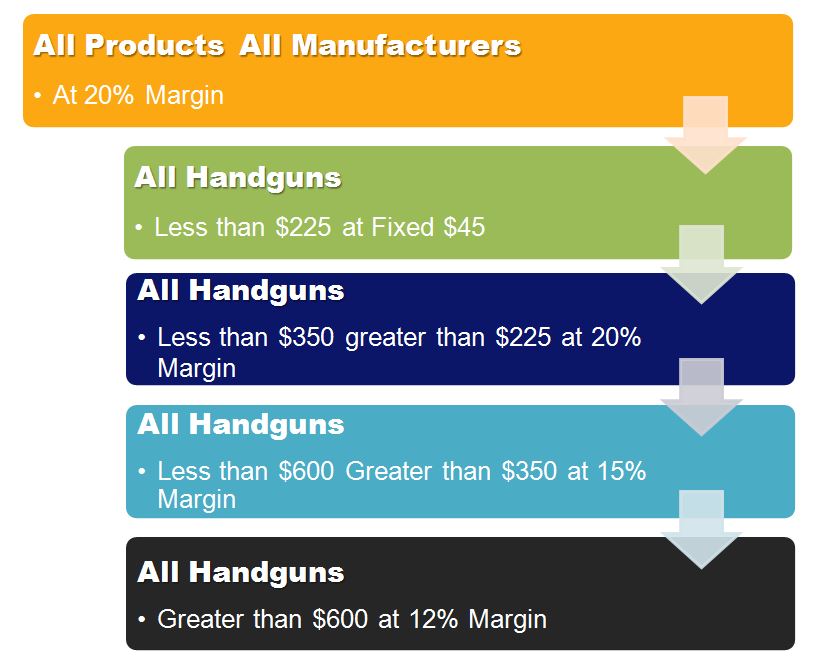 This is what our price plan will look like in the QPU... 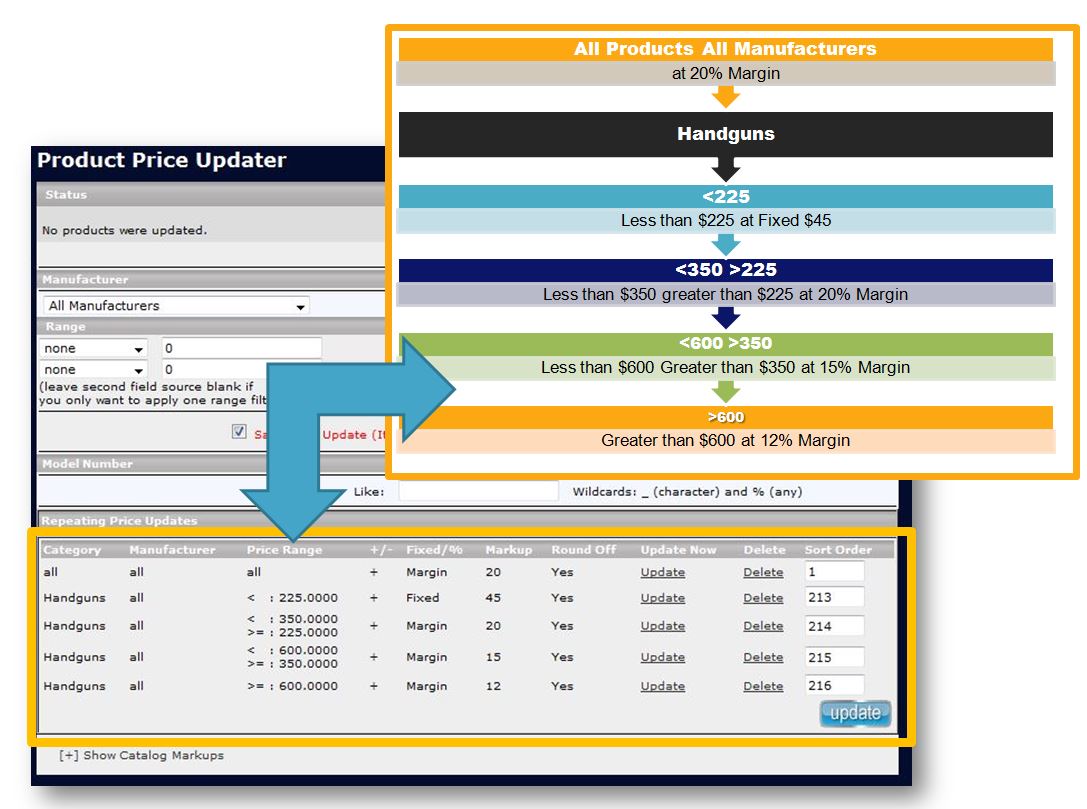 This puts the bulk of the the handguns at a 15% margin and makes sure that you make at least $45 on lower priced models. Sort OrderYou can create as many price rules as you wish but be mindful of the sort order. Sort order (the order in which the rules appear) is important when you are setting the price rules for your store. The QPU creates one rule at a time, then every rule you create after that it overwrites the previous rule.Need help? Have questions or don't have the time? Be sure to give us a call at 800.699.0820. We are here to help. You can also bring up any issues by using our ticket system. Hope this tutorial was helpful.For Example:So lets say that you want to price your all your scopes under $100 so you make at least $15 per item BUT you would like most of the items in your optics category (like covers, tools, Mounts & Rigs) to be marked up by margin at 15%, and all your higher priced scopes to have a 17% This is where sort order becomes important. 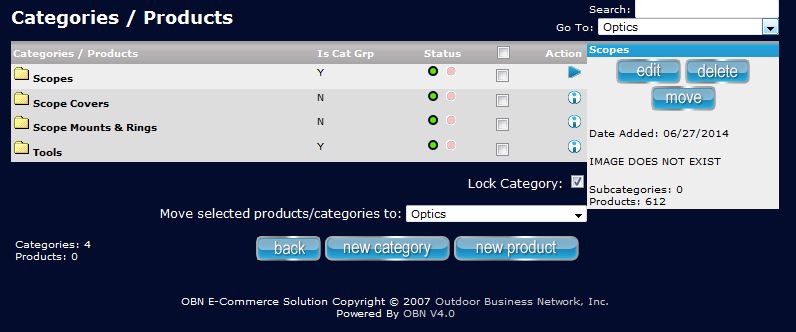 PRO TIP: To set your price rules, always use the "funnel down" approach outlined in the example below. Start with your largest category and end with the lowest, like a funnel. Your price plan could look like the following, with the largest category on top and the lowest category on the bottom: 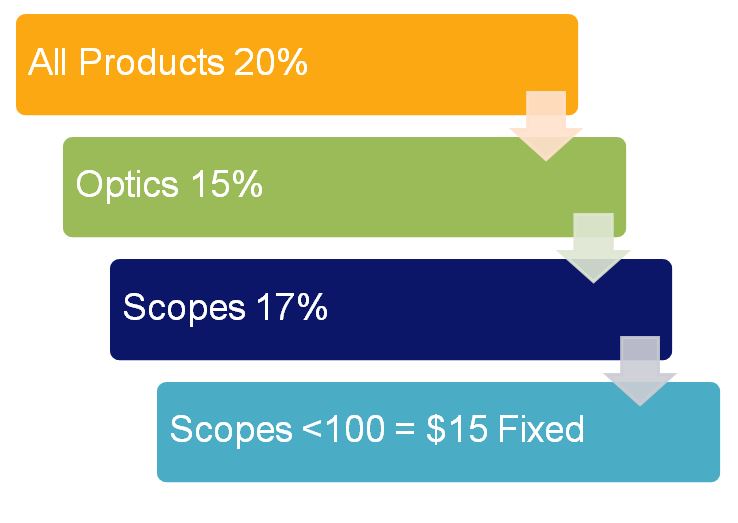 When you use the funnel down method the sort order the QPU overwrites the previous rule so you can customize price your products in a way that allows you to be profitable. 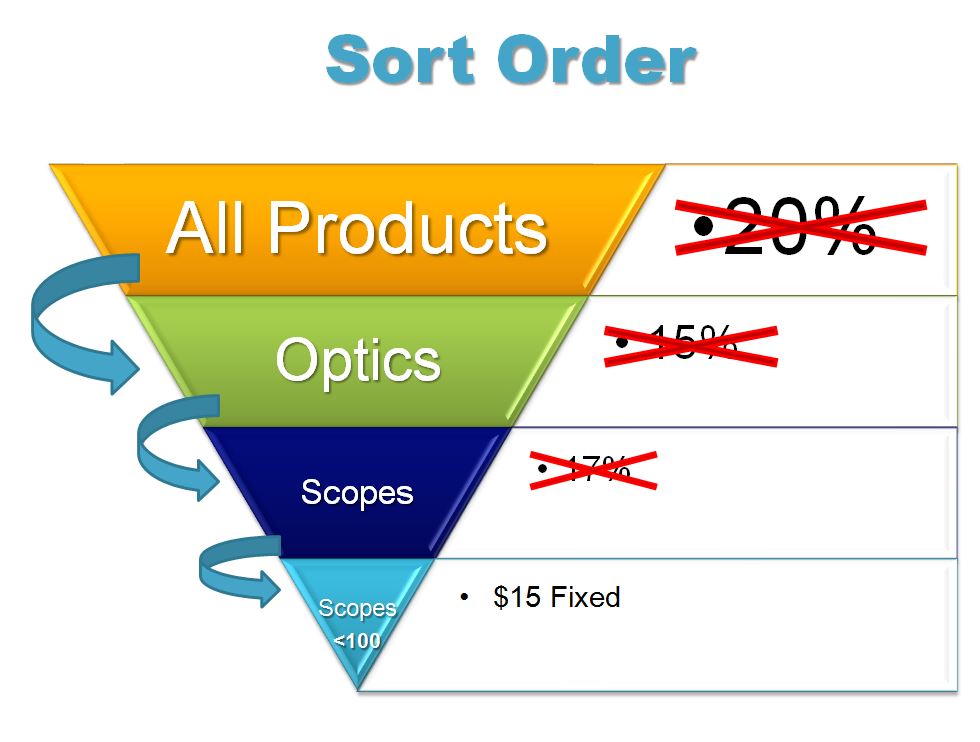 Once you enter it into the QPU it should go from largest category to the smallest to get all your scopes under $100 to make you at least $15 per item. 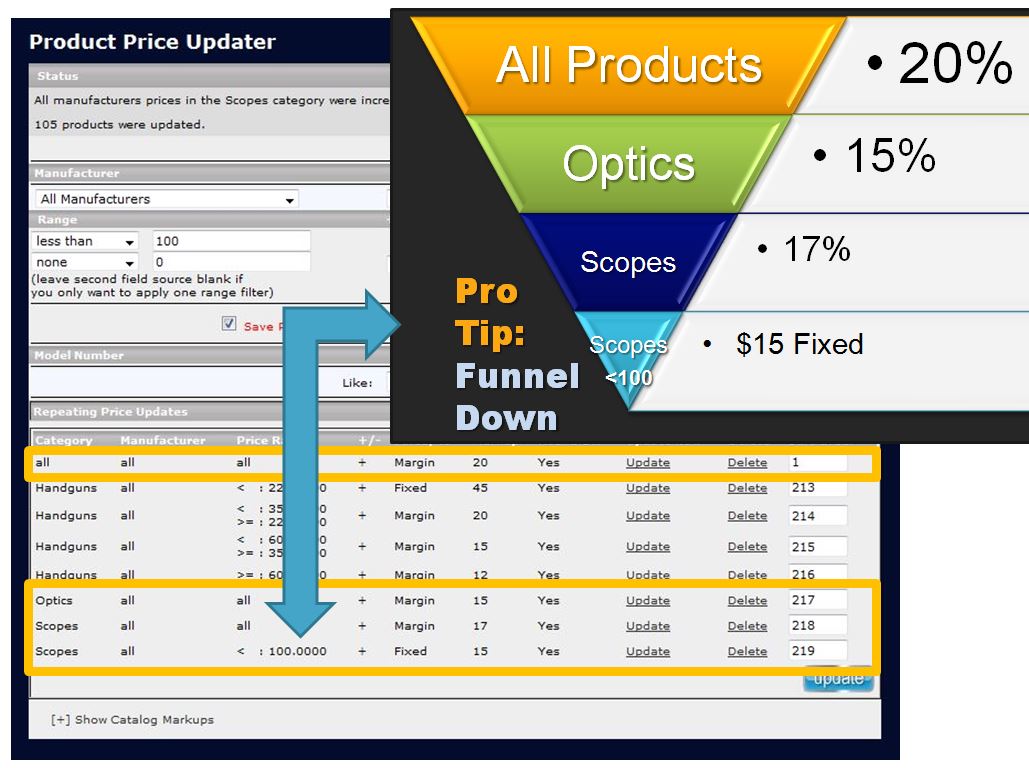 Troubleshooting: So if you enter the "Scopes under $100" before the "Scopes at 17% margin rule", your $15 Fixed will get overridden and your scopes under $100 on your site will be marked up by the 17% Margin.  |
- 6 Users Found This Useful
