Editing elements in a drop down menu | |
|---|---|
Finding the main template
|
|
|
1. Open your site (Home page) in Firefox. If its drop-down menu includes images, it can be edited using the following steps.  2. Open a new tab, then log in to the back end of your site. (Blue Screen) 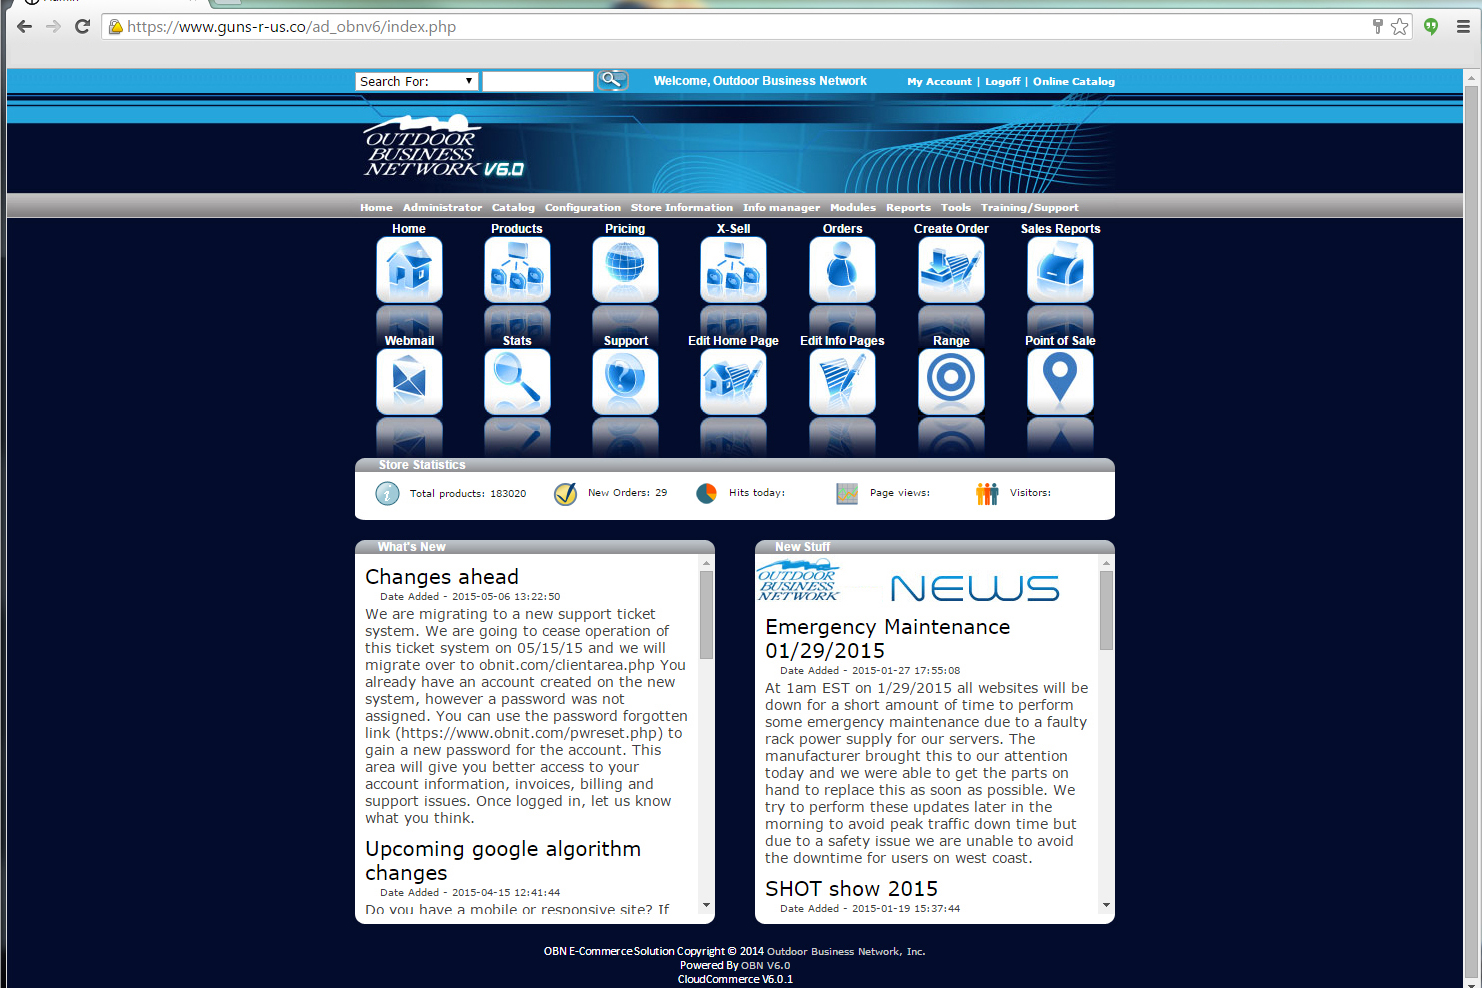 3. Located the gray bar top center of the page. Find "Info Manager". 4. Hover over "Info manager" to reveal a list of options. Scroll down to "Manage Templates" and from there select "Edit Templates". 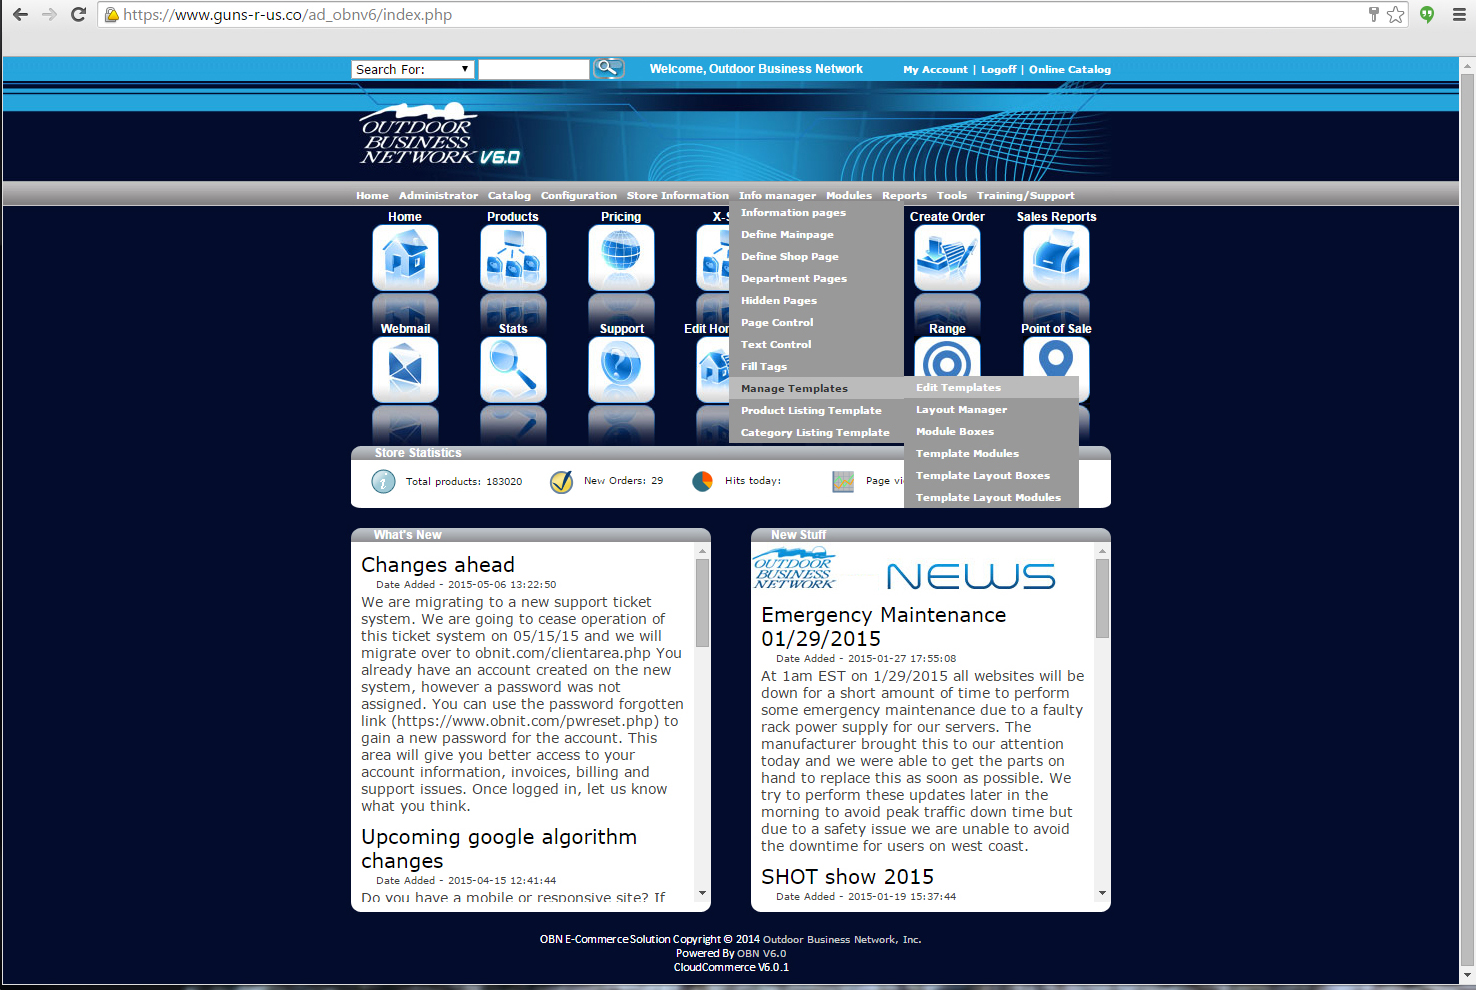 5. There will be many templates to choose from, but one should already be selected. See picture. Please note as of May 2015, this style drop-down is found almost exclusively in template 1.  6. Now that we know which template we are working in find the html for the dropdown menu. Scroll down to "Main Temple" and click that. 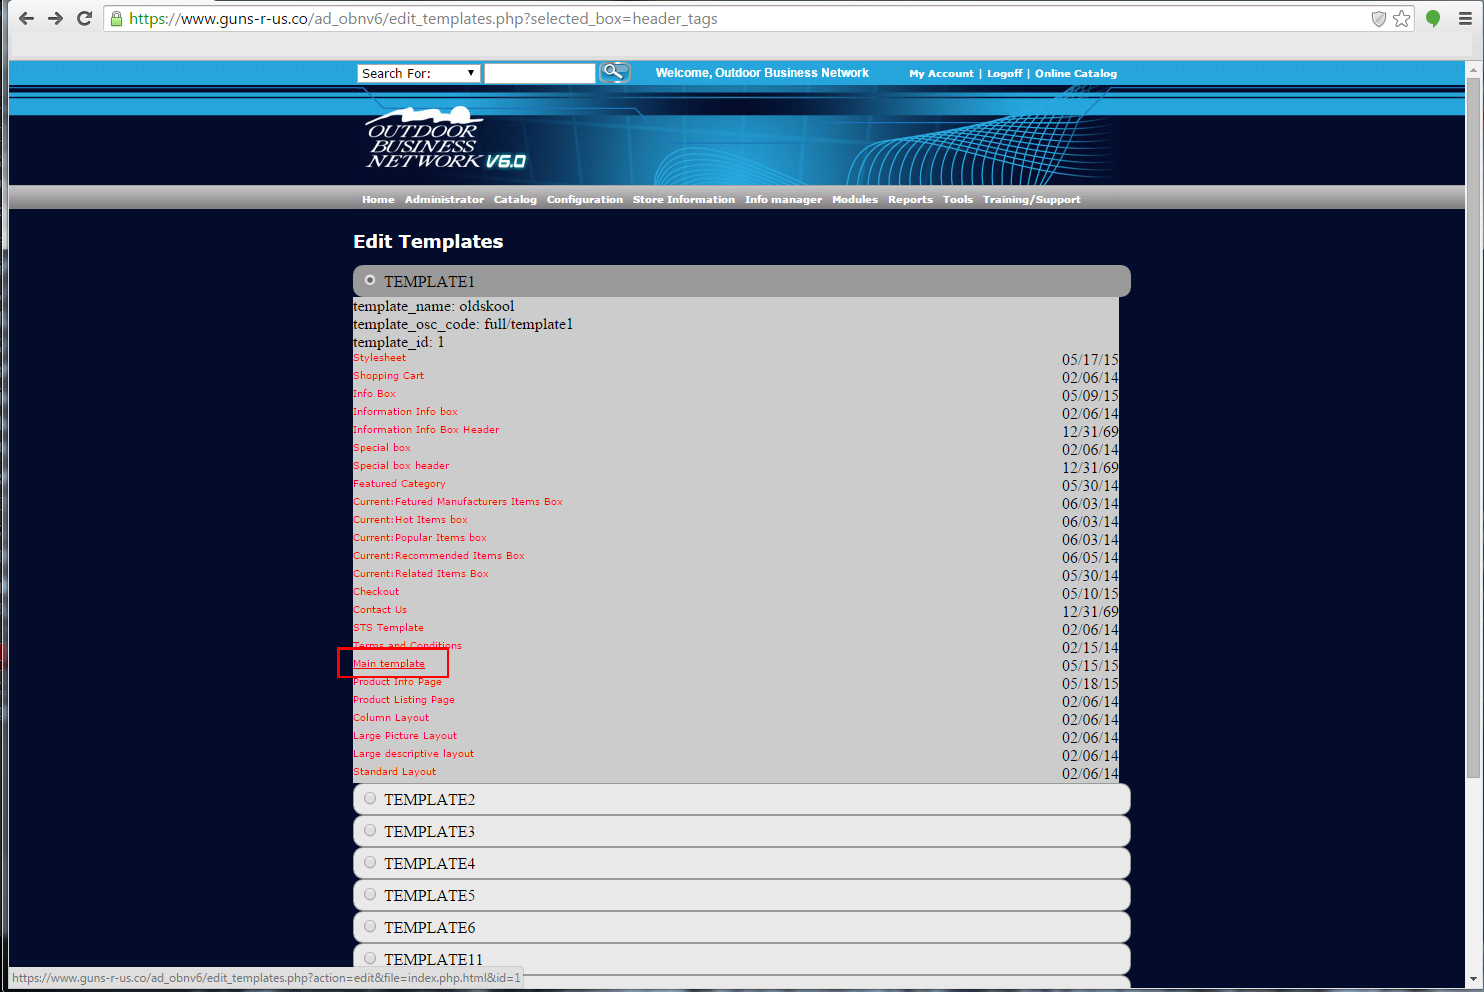 |
|
Finding the Menu code
|
|
|
7. As you can see, there is a lot of code to go through. So rather than scroll through it all we are going to take a shortcut. On your keyboard, hit control "F". 8. A small search tab will appear on your screen, type in "menu" and hit enter. This will take you to where you need to go. Make sure it highlights "Menu" within the UL tag. So what we are seeing is: <ul id="menu">. 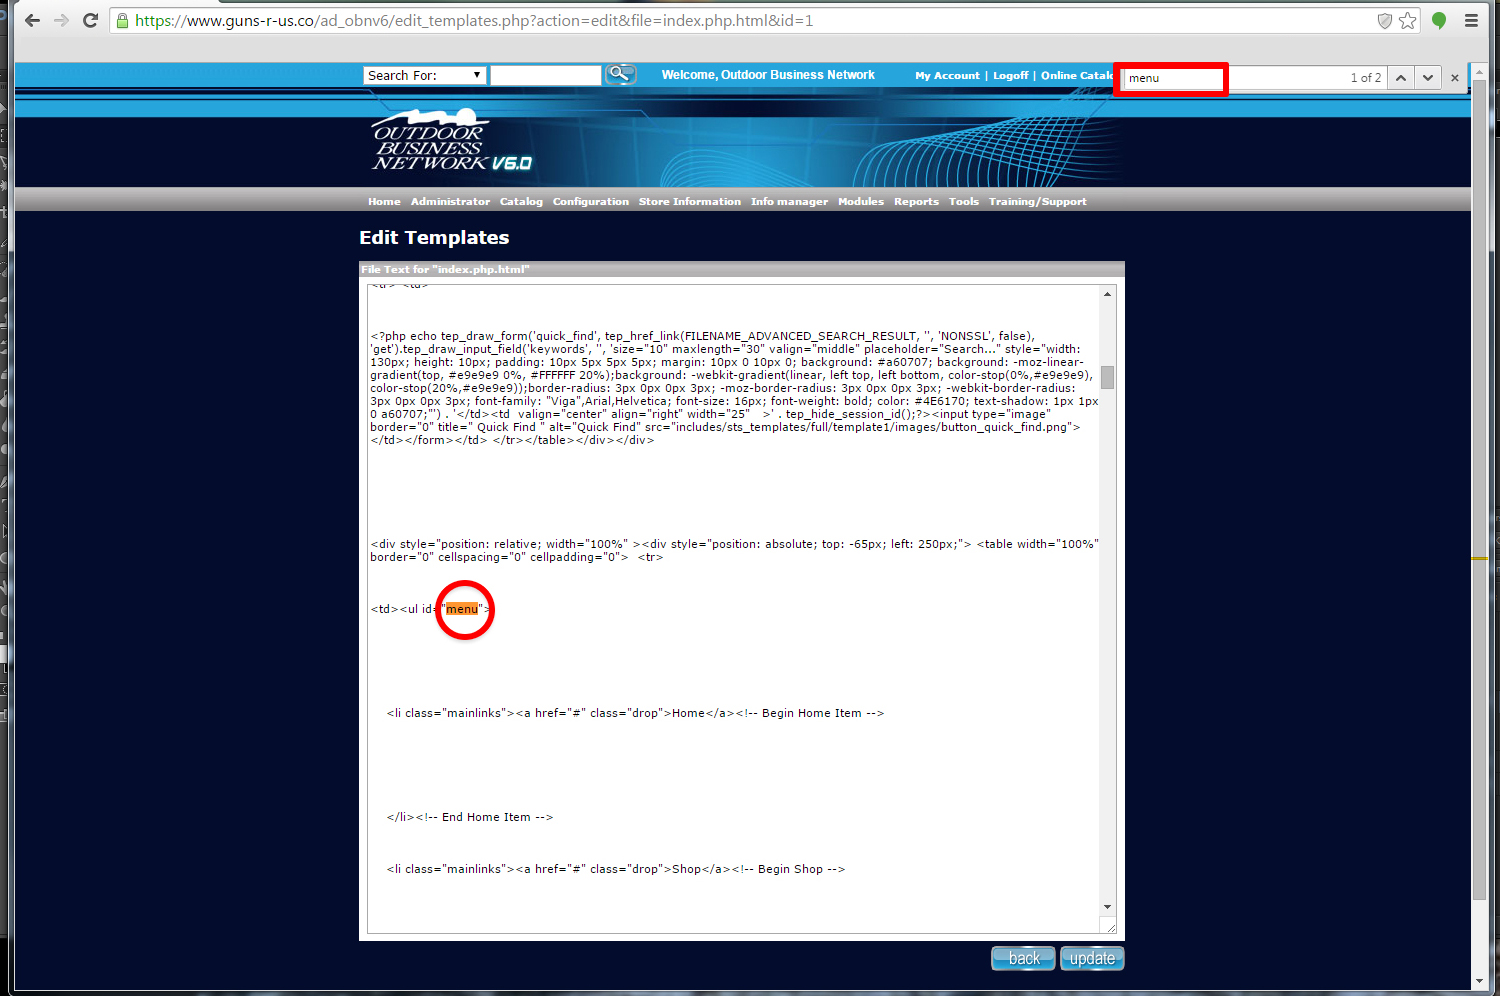 |
|
Adding a link
|
|
|
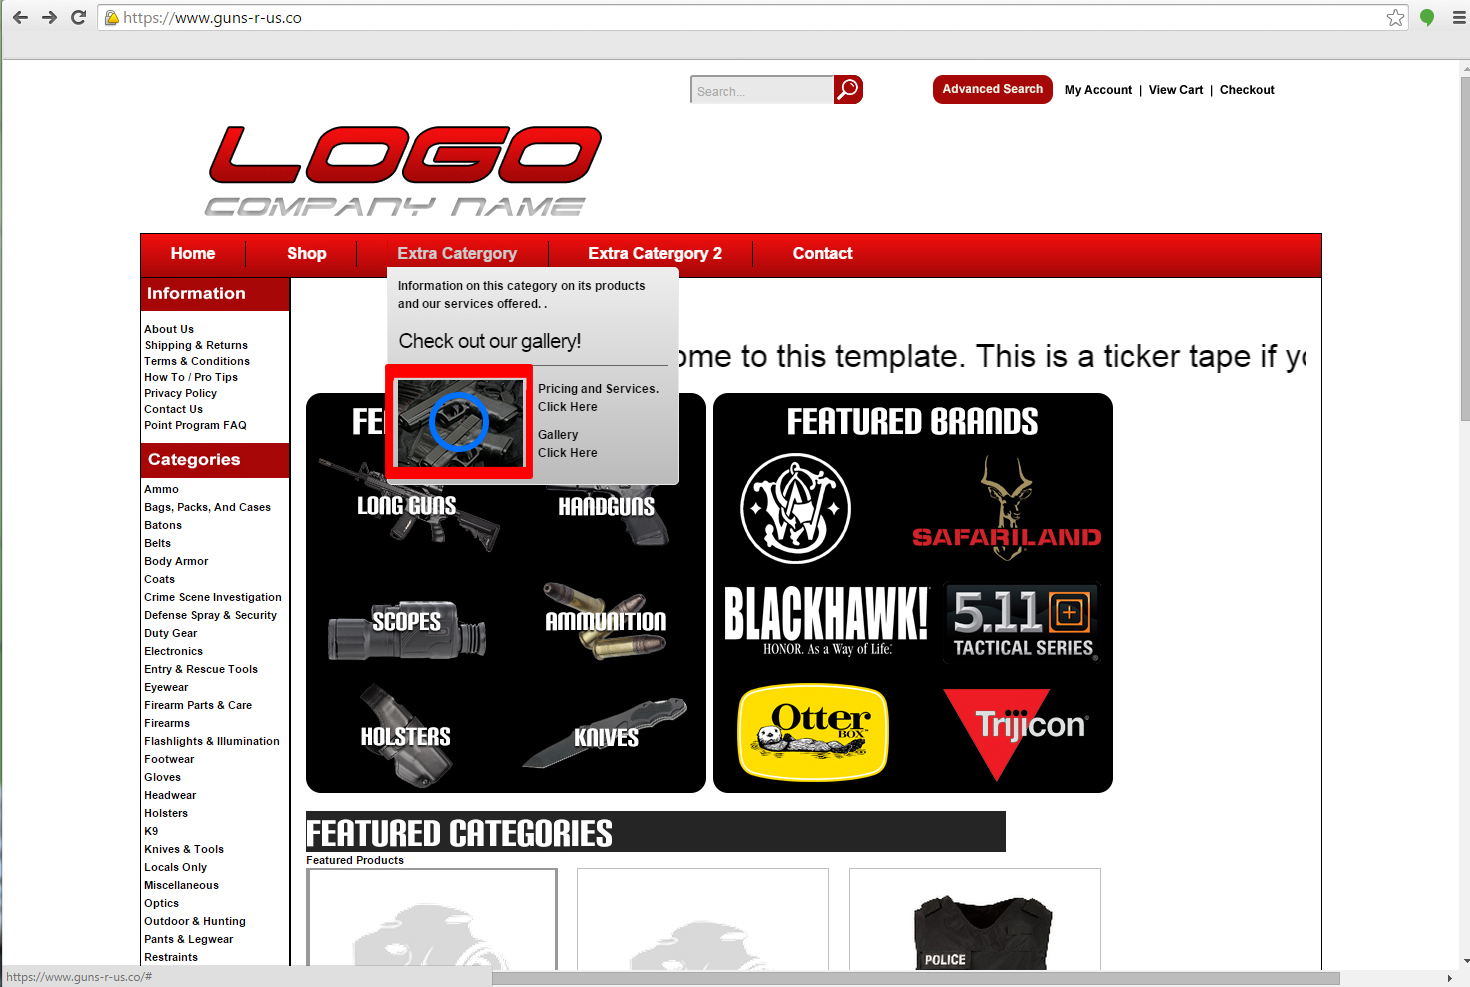
9. Now that we have found the code for our menu, let's find a spot for our new link. Look at your site now, we want to have this new link be under "Extra Category". 10. Now when we hover over this category we can see that there is no link to our price page so we are going to add the new link there. 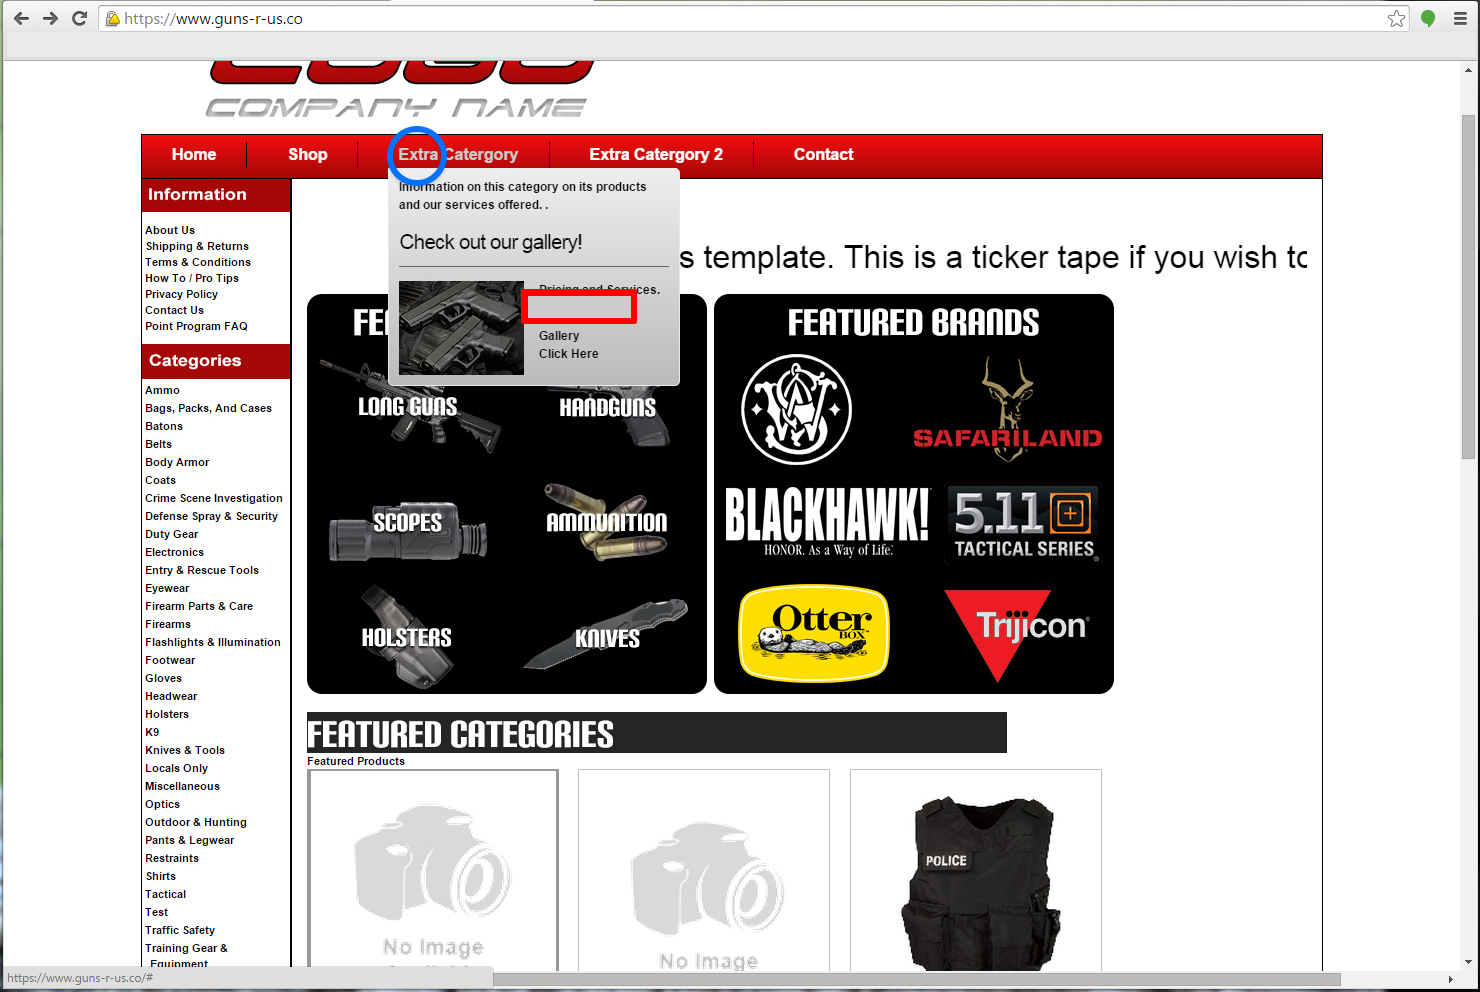 11. Alright, so we now know where this new link needs to be. Lets find a place for it in the code. You can either scroll down or use control "F" again. We are looking for "Extra Category". 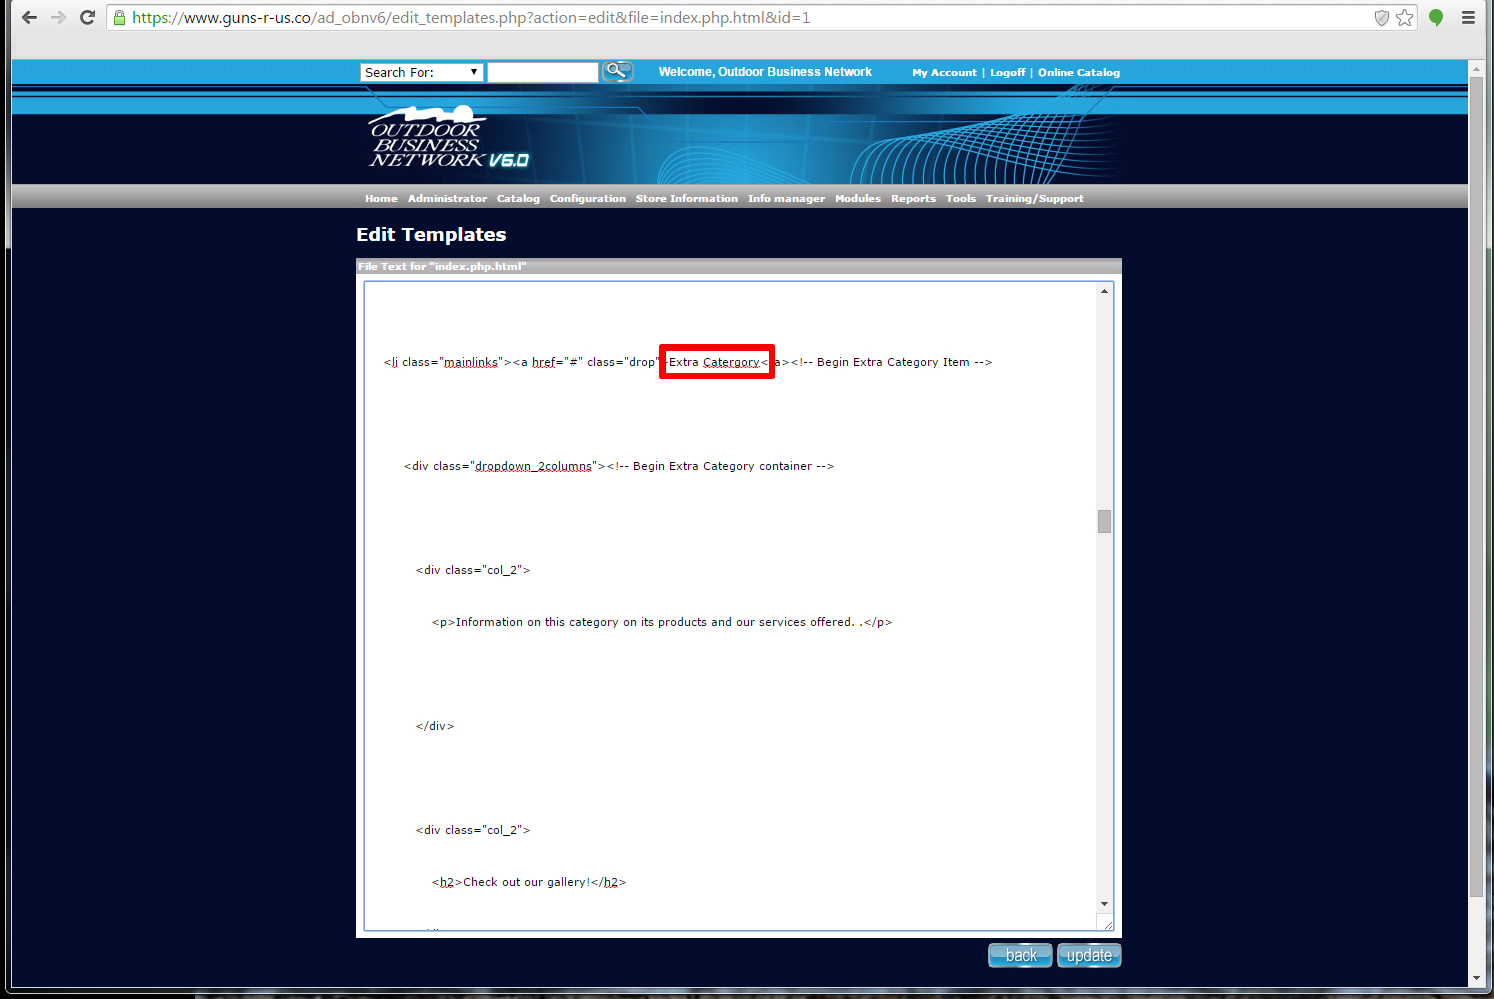 12. We found the "Extra Category" item, now lets scroll down to where "Pricing and Services" are. 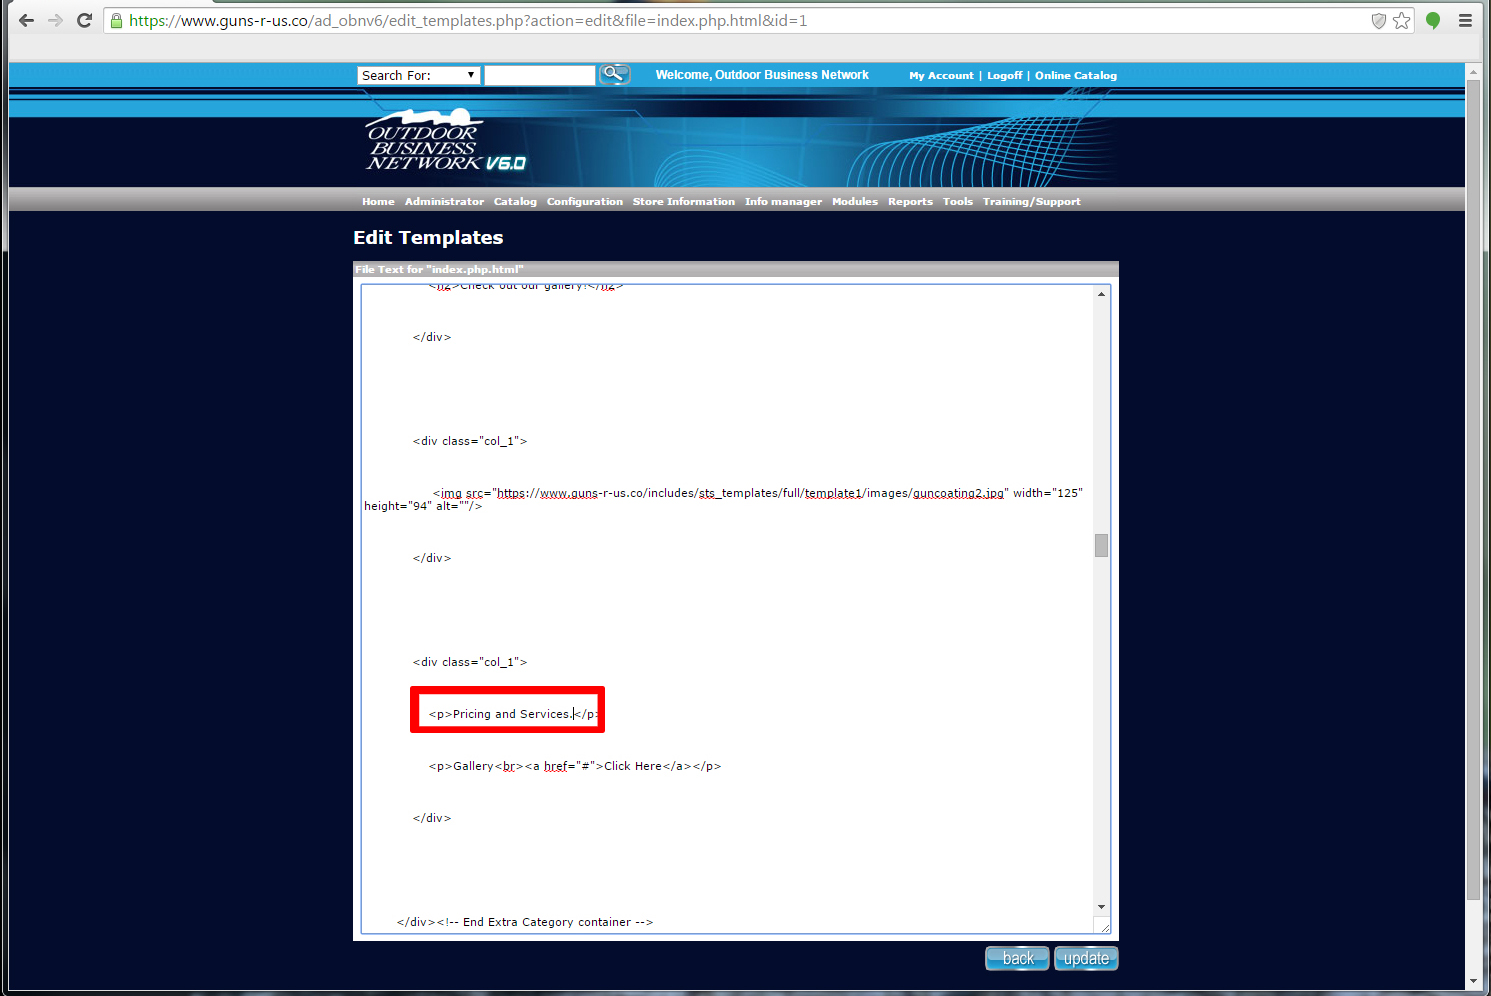 13. Next, we are going to use some basic html to add the link. So we will add <a href="#">Click Here</a> and place that within the paragraph tags.<p></p> 14. Because we want the link under Pricing and Servies, we add a "br" tag right before the <a href="#"></a> 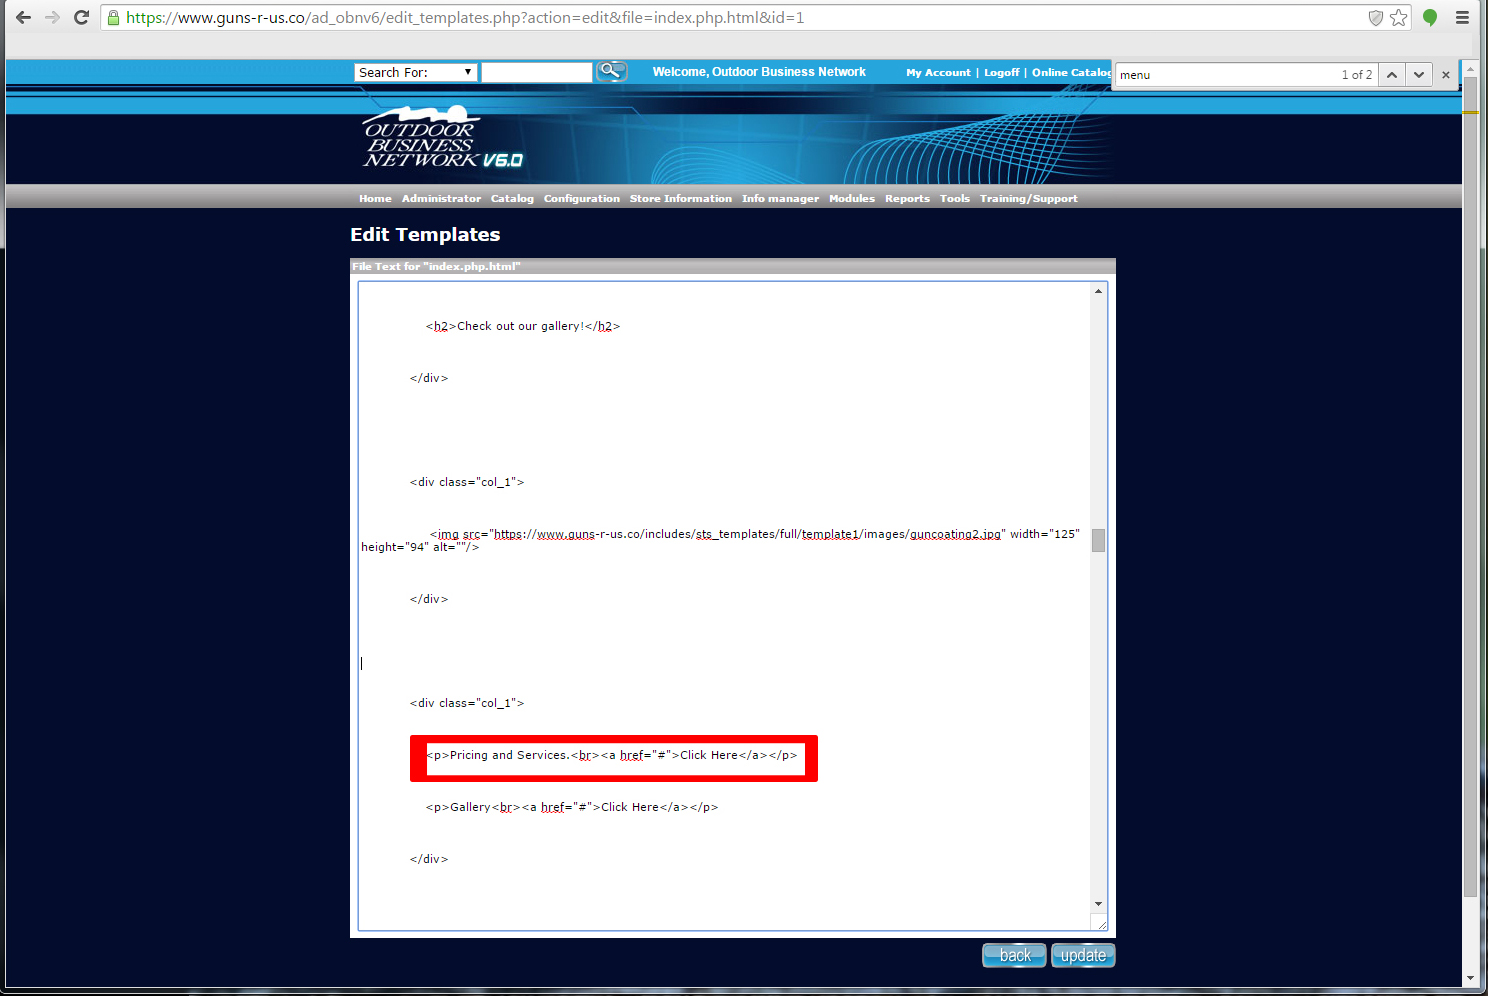 15. Replace he # within the quotation marks with the url for the new link. Navigate to the desired new page and copy the url from the address bar. This is where the url would go for the link. 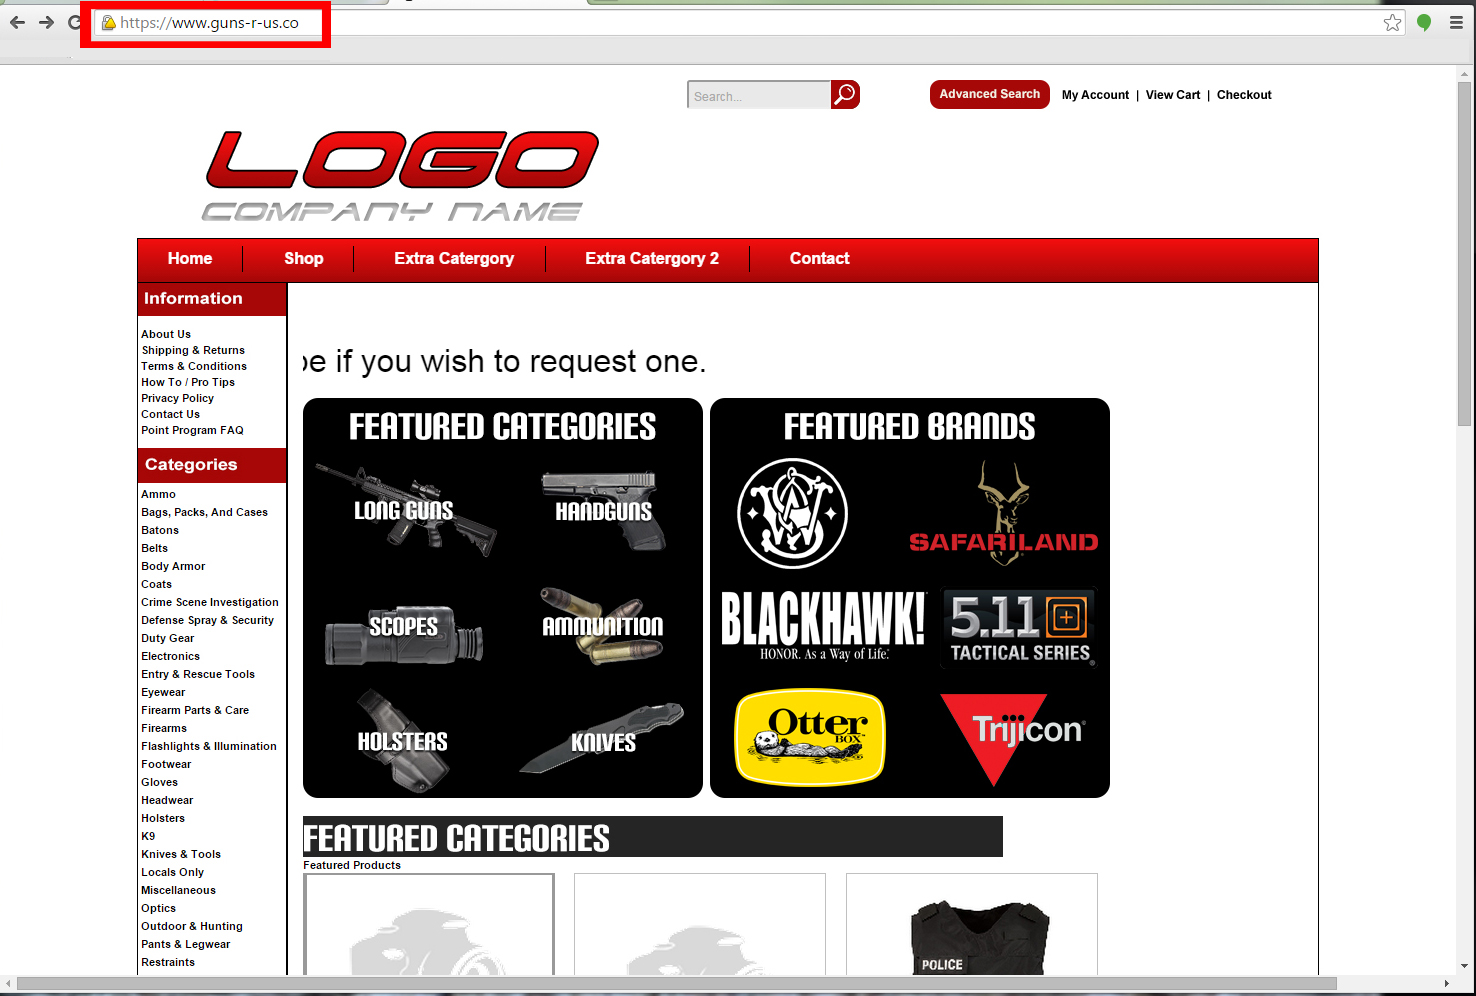 16. To finalize your work, look towards the bottom of the page at the button that reads "Update". Click that. 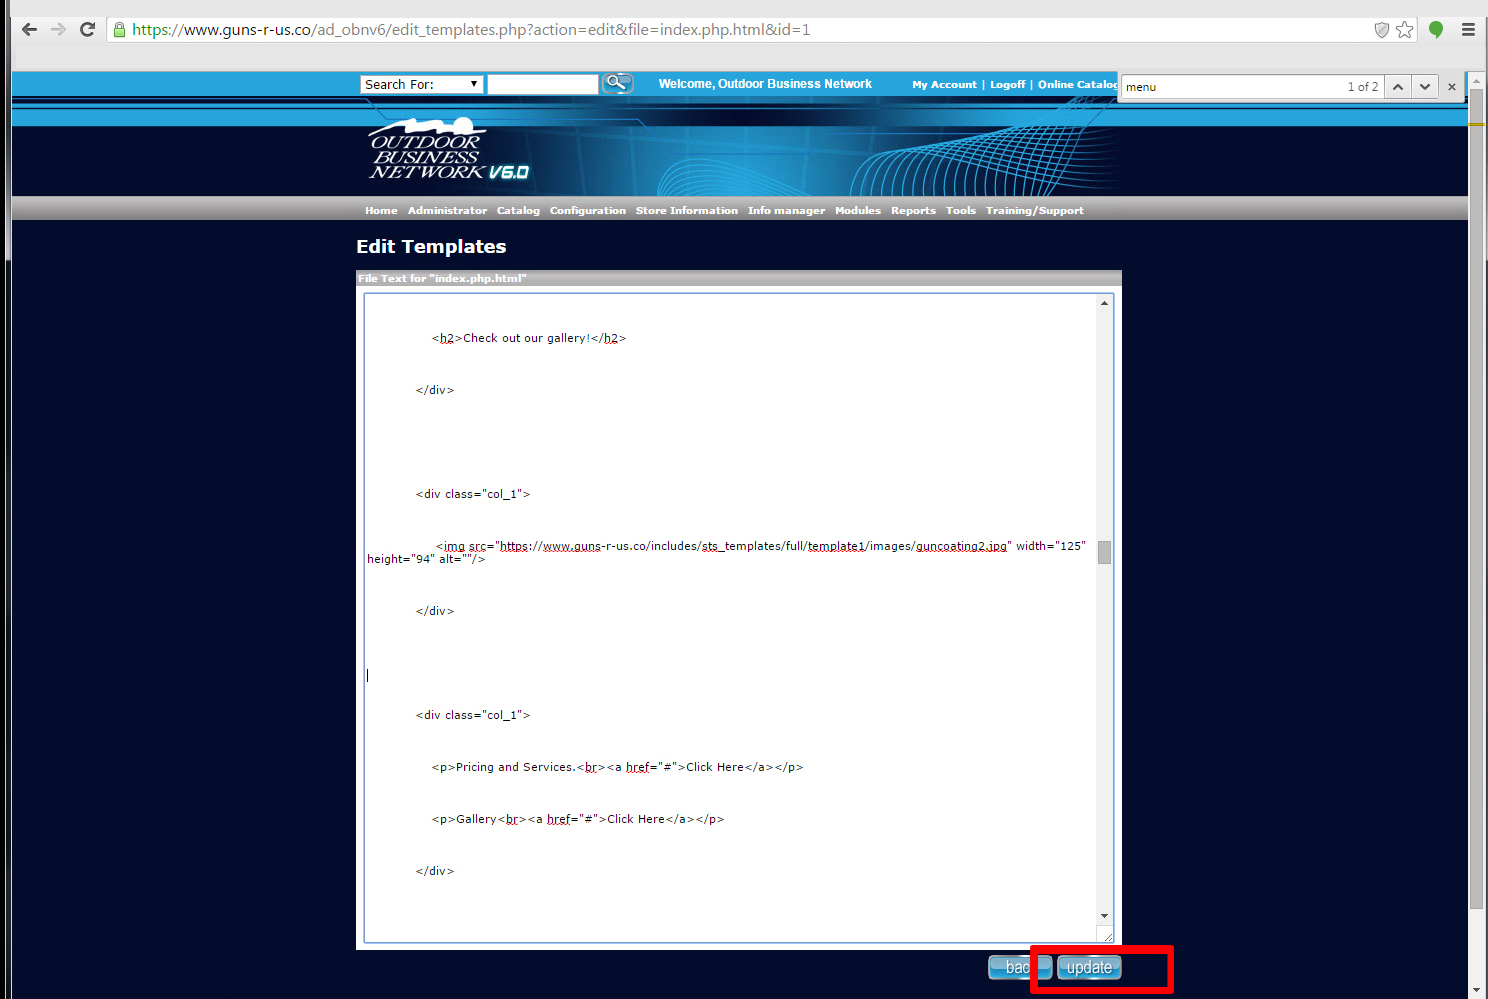 17. Lets see how it turned out. Go back to the site, hold down "shift" on the keyboard and click the "refresh" button at the top of the browser. 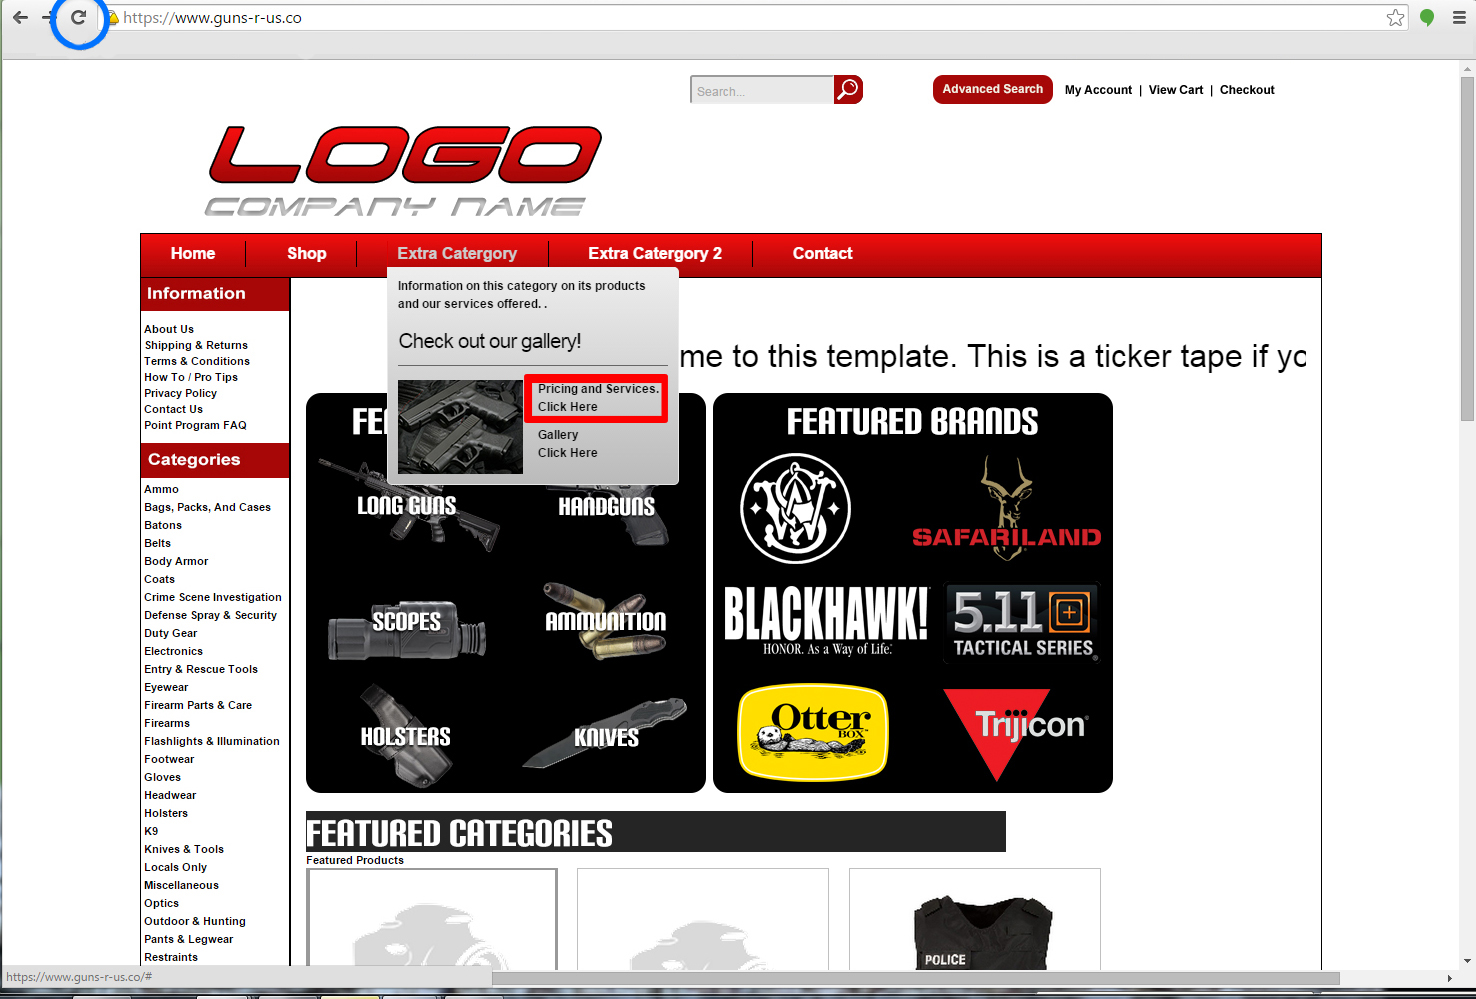 |
|
Deleting a link
|
|
|
18. Rebeat steps 9 through 12. 19. Highlight the entire link. <a href="#"></a> Hit delete on the keyboard. 20. Rebeat steps 16 and 17. |
|
Adding a picture to your dropdown.
|
|
|
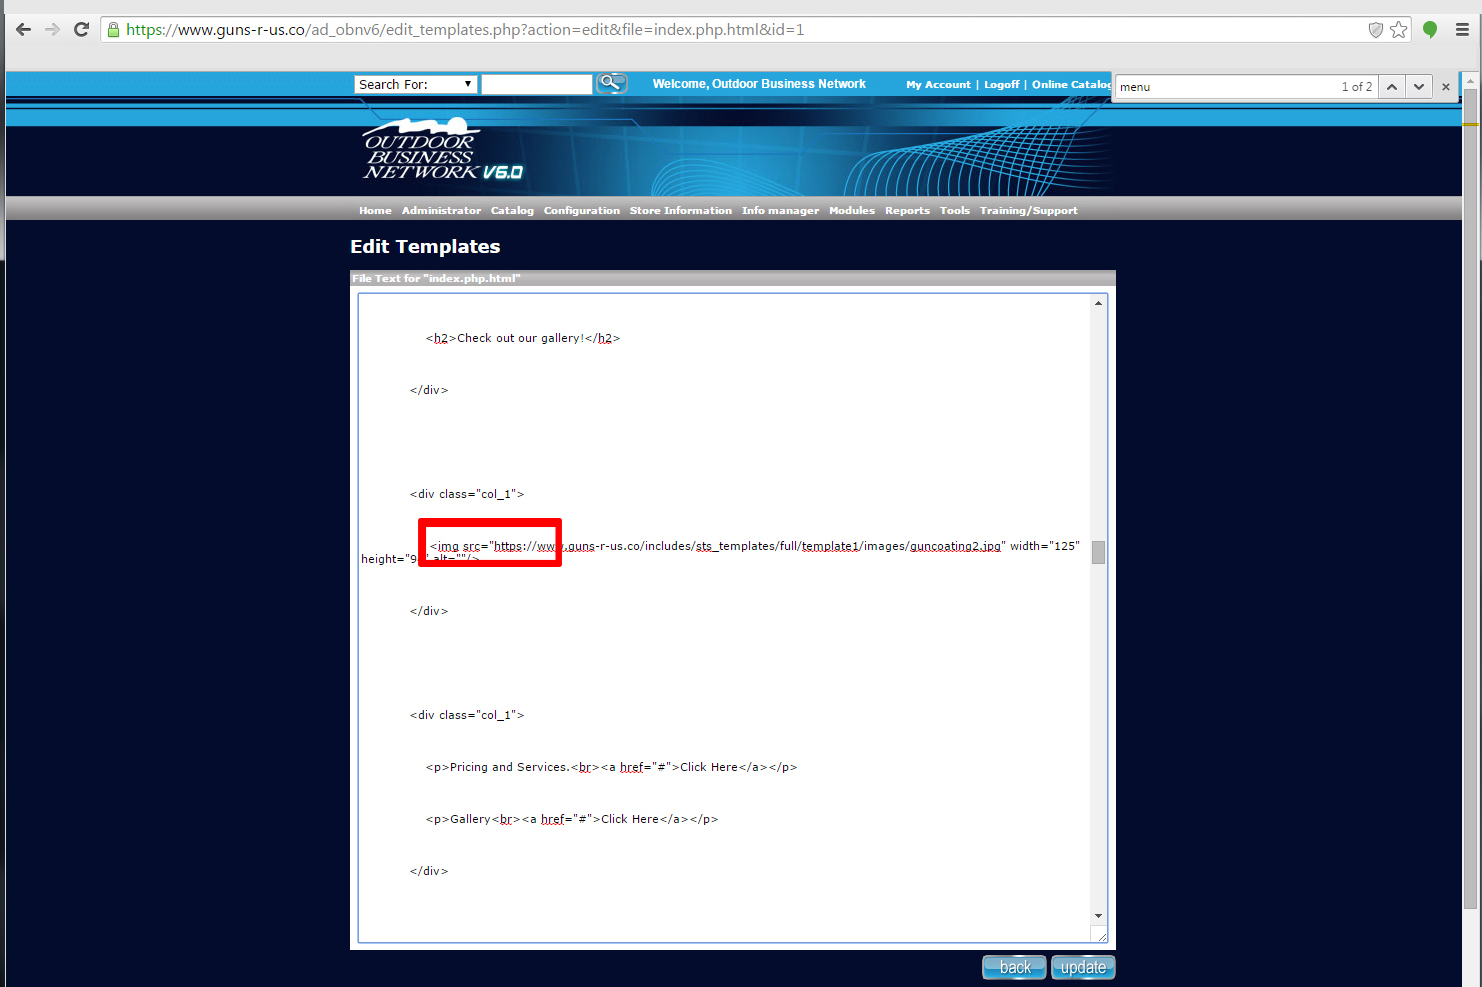
21. Rebeat steps 9 through 12. 22. Resize your image to fit in drop-down 23. Upload your image via the file manager under tools located on the gray bar. 24. We are going to be using basic html for this as well. <img src="#"> Copy the image url. 25. Find where you would like the image to appear. For example, we want it under "Extra Category" and next to the "click here" links that we have already added. 26. Using the img tag before: <img src> We are going to type up a line of code using the image url. <img src="Image Url" />. To make sure the image fits where it needs to be, we add the width and height elements. See image below.
27. Rebeat steps 16 and 17.
|
|
Need help? Have questions or don't have the time? Be sure to give us a call at 800.699.0820. We are here to help. You can also bring up any issues by using our ticket system. Hope this tutorial was helpful. |
|
- 0 Users Found This Useful
